Introduction
The Heslerton Web-CD has been created to allow users an easy way of getting
to as much of the primary data from the archaeological excavations as possible,
without having to seek out the actual primary sources themselves. To this
end, the Structural Catalogue was designed in the language of the World
Wide Web, Hyper-Text Markup Language or HTML. It was hoped that many users
would be familiar with the way the Web worked by the time that the Web-CD
was due to go out on general release, and thus would be able to delve into
it without too much prior training. As Microsoft intends to move towards
a seamless interface between its Windows and Office components and the
Internet, more and more people will be getting used to moving around their
computers in this way. However, it was realised that certain aspects of
the Web-CD would require explaining, and this short manual is designed
to give a general overview of the way the catalogue is structured, and
how to get around it.
How to use the Web-CD
If you can only see a small part of an image or map at any time you will
need to make your screen resolution higher. The Web-CD was designed to
be viewed on a minimum screen resolution of 1024 by 768 pixels, or higher.
We prefer using a resolution of 1280 by 1024. If your screen or graphics
card cannot reach this resolution, then set it as high as it will go (e.g.
800 by 600 pixels). A standard VGA screen resolution of 640 by 480 pixels
will make using the Web-CD very difficult.
The most important thing to realise about using a document written in
HTML is that you are not constrained by the text as you would be with a
normal book. The catalogue was not designed to be read from cover to cover,
but to allow you to find the aspects you are interested in just by
clicking on the relevant links on the page. What is a link? A link is something
that points to another part of the CD (a "target") and pressing the link
moves you to the target. Links are defined in a number of ways, some of
which are clearly visible and others which are not so obvious.
The most obvious links are those pieces of text which are coloured blue
and underlined (they turn purple when they have been activated). Clicking
the link will either take you to another part of the same document (for
instance to the section drawing or the finds data) or to another document
entirely. The context of the coloured text link will normally give you
some idea of what the link is going to point to. Click on this paragraph's
heading to be taken to another part of this document.
The Clickable Map Link
These are in effect "hot spots" on an image, which perform the same function
as an ordinary link. However, they are not visible in every browser. If
they are not visible, you can tell you are over one when the mouse pointer
changes from an arrowhead to a hand with the index finger pointing upwards.
This indicates that when you click on this area of the map, you will be
taken to the relevant target on the CD. To see this in action, click on
the Home link in the
lower left hand side of the Image bar at the top of this page. The link
will take you back to the Index Page of the catalogue. The clickable maps
work in the same way. Starting out from the view of the whole excavation
area, you can click your way in to a specific area. Further clicks will
take you to a specific feature, which in itself may be composed of a number
of interlinked documents and images. Using the Image bar links at the top
of every catalogue page, you should always be able to click your way back
out of the detailed catalogue entries, by using the Home link. This will
initially take you back to the Sub-Menu Page, and then back to the main
Index Page.
The  Icon Link
Where the camera icon is displayed, an image is available for viewing.
The image could be of slides taken during the excavation phase, aerial
photographs, finds drawings or scanned images. Moving the mouse over the
symbol will give a short textual description of the image. Clicking on
the camera icon will open up a new window with the image. If the window
opens as a full screen, it can be reduced and sized and remain visible
while the main document can still be viewed. If the window disappears while
you are sizing it, it probably means you have clicked just outside the
image window. You can bring it back by clicking on the JPEG bar which is
now minimised on the bottom menu bar. Closing the image window will
return you to the main document. You can close the window either by using
the File/Close menu option, or by pressing the Control and W keys. Click
the camera icon in the heading of this paragraph for an example.
Site and Area codes explained
The excavation of the settlement was carried out over a number of years,
and the excavation area was divided into a number of Sites (Sites 2, 11,
12 and 13). Each of these Sites was further subdivided into a number of
Areas, normally denoted by a single or double letter after the Site number
(e.g.. Site 12 Area AA). For a map showing the location of all the Areas,
click
here. Each time you are taken to an Area page, the location of that
Area in relation to the settlement excavation as a whole will be shown
in red in a small plan located to the right of the image bar. You can use
this plan to drive around the settlement Area by Area.
Context Numbers explained
The context numbers issued in the field are a combination of the Site and
Area codes with a five figure number added (e.g. Site 002 Area CA context
number 00016). This provides a unique 10 character Key-ID (e.g. 002CA00016)
which is used to keep track of everything associated with this given context
number, that is the all the objects, animal bones, drawings etc. Certain
conventions were used when issuing these numbers, thus context number 00001
was generally the number issued for each area's machine stripping of the
ploughsoil, and thus finds with this number are least likely to be in their
original positions. Context numbers 01000, 02000 and 03000 were issued
for the underlying natural geology, and equate to chalk, sand & gravel
and hillwash.
Master Numbers explained
Master numbers are numbers issued to provide a link for a number of related
contexts (for instance, all the fills from a Grubenhaus, all the postholes
of a posthole structure, or all the fill and cut numbers issued to excavate
an enclosure ditch). Many Master numbers were issued in the field, although
a number of them have been issued in the post excavation phase (these post-excavation
issues are numbered from 7000 onwards to differentiate them from Masters
issued during excavation). This catalogue has been constructed using these
Master numbers as the primary link, and this is the number which you will
see as the heading for each catalogue entry. Some features, such as pits
or short segments of ditch, are relatively simple and no Master number
was deemed to be necessary. In these cases, the cut number is used for
the catalogue heading and link.
Finding a Specific Context in the Web-CD
It may be that you know the context number you are interested in, but do
not know where to find it on the site map. In this case, it is necessary
to use the context search routine. This
will take you to an entry for the catalogue where the relevant context
is to be found. Clicking on the entry will take you to the page which contains
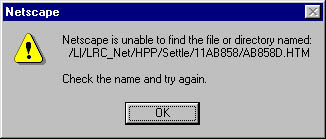
the context information. If the context or a link cannot be found
then the error message illustrated below will appear, which means that
the required context has yet to be added to the catalogue.
If you are only interested in a specific type of feature, for instance
spits,
post
hole structures or Grubenhäuser,
then you have an alternative search capability. As well as occurring in
the main context search routine, certain feature types have been extracted
into their own search htm files, and you can search these as you would
the main routine.
The Structure of the Web-CD
The structure and rationale behind the development of the Web-CD are explained
in depth in The Heslerton HTML Archive
or WEB-CD (published in Internet Archaeology 4) and Publishing
in the round: a role for CD-ROM in the publication of archaeological fieldwork
results (published in Antiquity, Volume 71, pages 1062-1066), although
a number of points may need clarification.
Each of the pages has a set number of components, which always occur
in the same order. These are:-
1) The image bar across the top of the page, which allows you to move
around the Web-CD, even if this just means going back to the start page.
Sometimes there is a further image to the right of the start bar (ie in
the area pages) which shows you where you are in relation to the rest of
the site. You can also use this image to get to the other areas.
2) The unique master number assigned to this feature or group of features.
3) A clickable map which is generally a plan of the feature or master
group of features. For smaller features (pits, post holes and all structures),
all of the other features visible in the map will be hot-linked to their
specific catalogue entries. For longer features (enclosure ditches), a
different technique was adopted. In order to avoid confusion, these maps
show the relevant enclosure in red, with the rest of the features in grey.
Only the red feature has links (to the section and context notes).
4) Certain pages will then have a details table, which lists the relevant
set of details for that type of feature (ie post hole structures, spits,
enclosure ditches etc). This table is not included if the feature is a
single pit or post hole.
5) The phasing of the feature is then discussed, together with a stratigraphic
matrix diagram with the relevant context numbers. Several different forms
of matrix diagrams are included. These developed as new software allowed
more complex types of matrix to be displayed in Web format. The first matrices
are purely images which give a simplified extract of the master matrix,
from an Excel file format. These were followed by creating clickable maps
of the Excel sheets, by saving them as JPG files and then adding the links
to the relevant pages. All of the spit matrices for each area were done
in this way, showing only their relationships to each other, but not to
all of the other features which they sealed, as this would have meant including
large sections of the matrix on a single Web page. As we neared the end
of the catalogue creation process, it became possible to link the matrix
directly to the web pages. Although the entire matrix could be included
on a single web page, this proved impractical at current machine speeds
and retrieval rates. Instead, the relevant part of the matrix is cut out
and saved as a table, which contains the links to the features immediately
above or below the feature.
Note: The matrix is not included if the feature consists
of a single fill and cut, and was found immediately under the machine clearance,
was cut directly into the natural, and had no relationships with other
features.
6) A short discussion of the feature.
7) A table containing all context numbers and the associated object
and animal bone finds from each context. These totals relate to animal
bone finds which were identifiable by species only, and do not include
all of the fragments and splinters of bone which could not be identified.
The links take you to a table of totals; by species in the case of animal
bones, and by period and material in the case of objects. These tables
in turn will link to a more detailed table which contains information about
each find.
8) The abbreviated context details. Generally, the section drawings
for each feature will be included here. If they are not, then either they
were never drawn during the excavation season, or they have not yet been
found by the post-excavation team.
Note: The structure of the entries for spits altered somewhat
during the final stages of catalogue creation. The image map is not
clickable, and is not a plan of the spit boundaries as before, but rather
the spread of material above the underlying features. All of the finds
tables were left out, to be entered automatically at a later date. In this
way, an entry for each individual feature could be created before the end
of the project was reached..
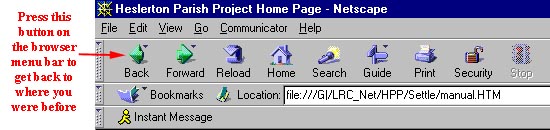
The link was to this piece
of text in the same document. If you can't find a "back" button on your
browser menu bar, then click the right mouse button. This will bring up
a small menu which has a "back" option on it.